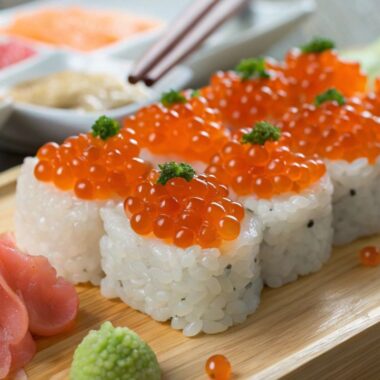
Have you ever stepped into a sushi restaurant and been captivated by the vibrant, orange pearls of salmon roe atop perfectly shaped sushi? This delicacy, loved for its rich flavor and unique texture, might seem like something only a skilled sushi chef could create. But here’s the great news: you don’t need to be a professional to make salmon roe sushi at home! With a handful of simple ingredients and a few easy techniques, you can recreate this stunning dish in your own kitchen. Ready to get started? Let’s explore the steps to make this delicious treat.
Table of Contents
What You’ll Need to Make Salmon Roe Sushi at Home
Before diving into the exciting process of making sushi, let’s make sure we have all the essential ingredients. The good news? You don’t need any specialized tools or advanced skills to get started. Here’s everything you’ll need:
| Ingredients | Quantity |
|---|---|
| Sushi rice | 2 cups |
| Rice vinegar | 1/4 cup |
| Salmon roe (Ikura) | 1/2 cup |
| Nori (seaweed sheets) | 4 sheets |
| Sushi rolling mat | 1 |
| Sugar | 1 tablespoon |
| Salt | 1 teaspoon |
With these ingredients at your fingertips, you’re all set to begin. Take your time—each step plays a key role in crafting the perfect sushi. Let’s go through the process step by step to ensure delicious results. 🍣
Step 1: Preparing the Sushi Rice
The secret to delicious sushi lies in the rice—it’s the foundation that brings everything together. Getting it just right is essential for perfect sushi. Here’s how to prepare it:
1. Rinse the Rice: Begin by rinsing the sushi rice thoroughly under cold water until the water runs clear. This step is crucial to wash away the excess starch, which can make the rice overly sticky. The goal is to achieve the perfect balance—sticky enough to hold its shape, but not so sticky that it turns into a mushy mess!
2. Cook the Rice: Cook the rice using a rice cooker or on the stove, following the specific instructions on the package. Typically, sushi rice requires a 1:1 ratio of rice to water, but checking the packaging is always a smart move to ensure perfect results.
3. Season the Rice: Once the rice is cooked, it’s time to season it. In a small bowl, combine rice vinegar, sugar, and salt, stirring until fully dissolved. Gently fold this mixture into the warm rice, ensuring each grain is evenly coated. This step infuses the rice with the classic, tangy-sweet sushi flavor that makes it so irresistible!
Let the rice cool to room temperature before using it. Now, your sushi rice is ready! It should be slightly sticky and flavorful—perfect for making sushi.
Step 2: Preparing the Salmon Roe
Salmon roe is the highlight of this dish, and handling it with care is essential to maintain its freshness and delicate texture. Treat these vibrant pearls gently to ensure they shine in your sushi creation!
1. Check the Freshness: The quality of your salmon roe is key to making exceptional sushi. Look for bright, shiny eggs that are plump and intact—avoid any that appear dry or cracked. Fresh salmon roe should have a clean, briny aroma reminiscent of the ocean, never a strong fishy smell.
2. Rinse the Roe:
Carefully rinse the salmon roe under cold water to remove any excess salt or preservatives from storage. This simple step enhances the roe’s natural flavor, ensuring it tastes fresh and clean for your sushi masterpiece.
3. Set Aside:
After rinsing, place the salmon roe in a small bowl, ready to crown your sushi with its vibrant flavor. Remember, salmon roe is best enjoyed fresh, so try not to let it sit for too long before using it!
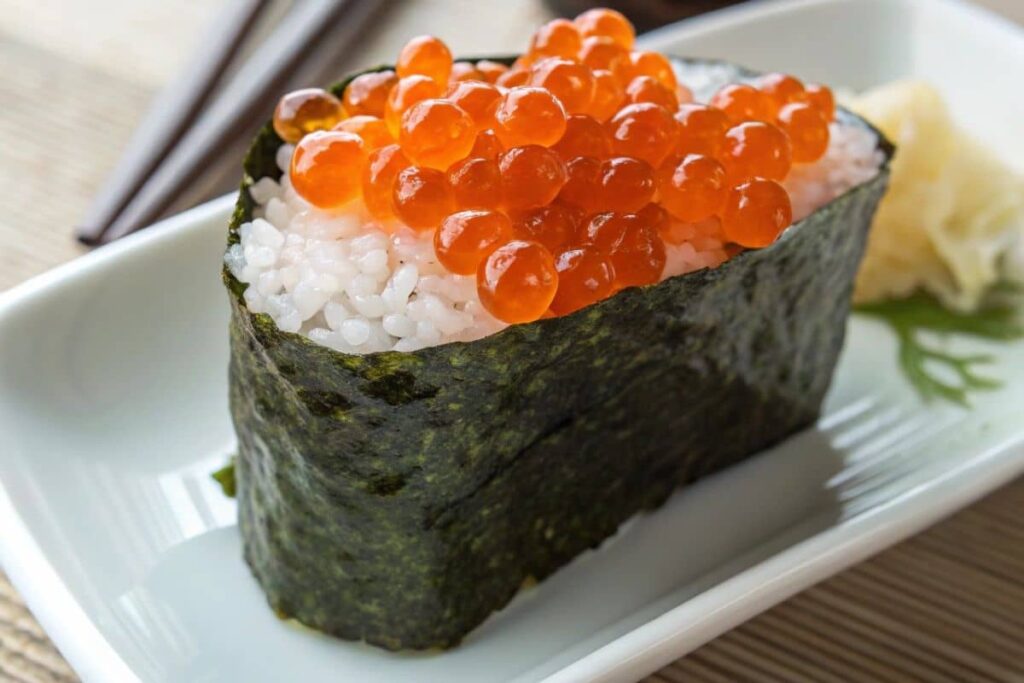
Step 3: Preparing the Nori
Nori, the seaweed that wraps your sushi, adds a rich umami flavor and holds everything together. Preparing it properly is key to great sushi. Here’s how to get your nori sheets ready:
1. Cut the Nori:
You’ll need one full sheet of nori for each sushi roll (maki). If you’re making hand rolls (temaki), cut the nori into smaller pieces, about a quarter of a sheet. Adjust the size based on the type of sushi you’re preparing!
2. Toast the Nori (Optional):
For a flavor boost, lightly toast your nori. Hold the sheet over a low flame for a few seconds, gently waving it back and forth until it releases a subtle aroma and becomes slightly crisp. While optional, this step can take your sushi to the next level of deliciousness
Step 4: Assembling the Sushi
Now comes the exciting part—bringing your sushi to life! This is where you combine all the elements and let your creativity shine as you assemble your masterpiece.
1. Place the Nori: Place the nori sheet flat on your sushi rolling mat with the shiny side facing down. If you don’t have a rolling mat, no worries—you can roll the sushi by hand, though the mat makes it easier to achieve a neat and uniform roll.
2. Spread the Sushi Rice: Wet your hands with a little water to keep the rice from sticking. Take a small handful of sushi rice and gently spread it evenly over the nori sheet, leaving about 1 inch of space at the top. This gap will allow you to seal the roll when you’re finished.
3. Add the Salmon Roe: Carefully spoon a small amount of salmon roe onto the rice, spreading it evenly. A little goes a long way, providing that delightful burst of flavor in every bite. If you’d like an extra kick, you can add a touch of wasabi or a drizzle of soy sauce at this stage.
4. Roll It Up: Begin rolling your sushi by gently lifting the edge of the nori closest to you. Using the sushi mat as a guide, roll it away from you, keeping it firm but not too tight—you want to avoid squishing the rice or the salmon roe. The goal is a neat, evenly shaped roll.
5. Seal the Roll: Lightly moisten the edge of the nori with a small amount of water to help seal the roll. Press gently to ensure it stays closed. Congratulations—you’ve just created a beautiful roll filled with salmon roe!
Step 5: Slicing and Serving the Sushi
The final step is to slice and serve your sushi. Here’s how:
1. Slice the Roll: Using a sharp knife, carefully slice your sushi roll into bite-sized pieces for a clean and polished presentation. If you’re making hand rolls, there’s no need to slice—just enjoy them as they are for a more casual dining experience.
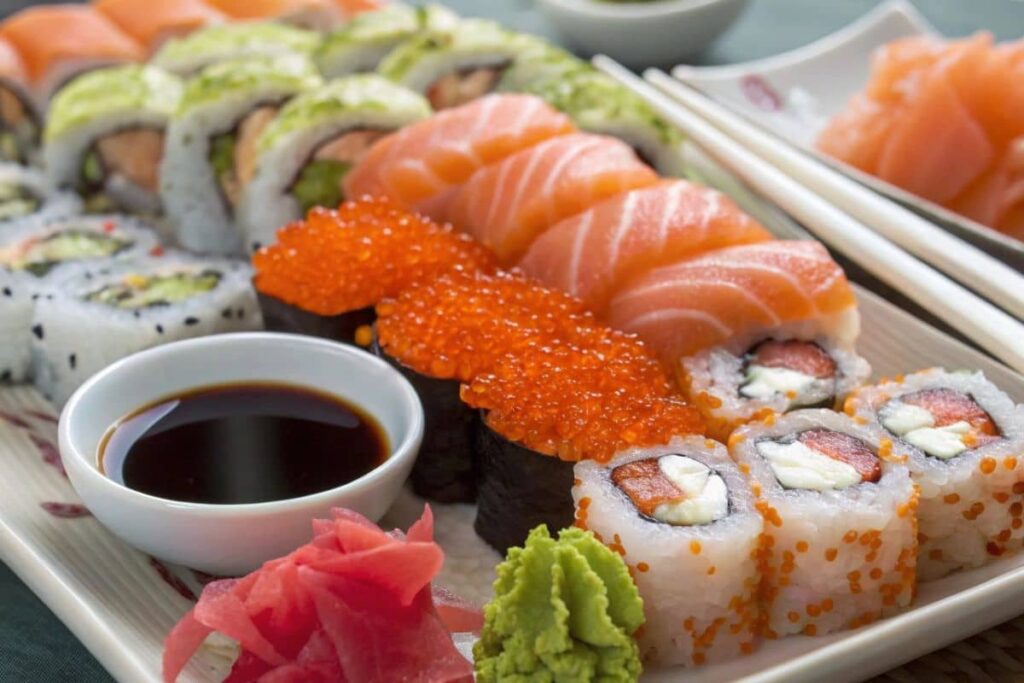
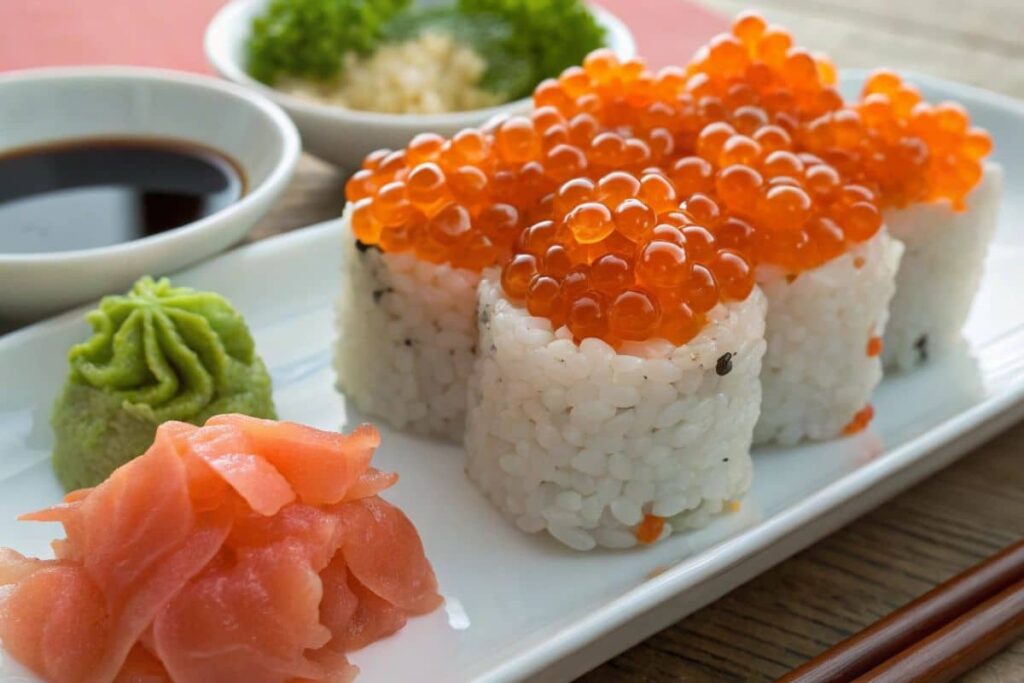
2. Serve and Enjoy: Arrange your salmon roe sushi beautifully on a plate, and pair it with soy sauce, wasabi, and pickled ginger to complete the authentic sushi experience. For the best taste, savor it right away while the roe is fresh and bursting with flavor. Enjoy your homemade masterpiece!
Why Salmon Roe Sushi is a Must-Try
Salmon roe sushi is more than just a dish—it’s an experience! Each bite delivers a burst of juicy eggs that contrast beautifully with the tender sushi rice and crispy nori. Whether you’re a sushi newbie or a seasoned enthusiast, crafting salmon roe sushi at home is both fun and fulfilling. Plus, it’s a nutritional powerhouse, loaded with omega-3 fatty acids, proteins, and essential vitamins. Delicious and healthy? Yes, please!
Nutrition Facts
| Nutrition Fact | Per Serving (1 Roll) |
|---|---|
| Calories | 250 |
| Protein | 8g |
| Fat | 7g |
| Carbohydrates | 35g |
| Sodium | 300mg |
| Omega-3 | 1g |
Now that you’ve perfected the art of making salmon roe sushi, it’s time to wow your friends and family with your newfound sushi-making skills. Whether you’re crafting it for a special celebration or simply enjoying a fun weekend kitchen adventure, salmon roe sushi is guaranteed to be a crowd-pleaser.
Common Problems with Salmon Roe Sushi and How to Fix Them
Problem: The Fishy Taste
One of the most common complaints when it comes to salmon roe sushi is a fishy taste. No one wants their sushi to taste like it’s been sitting in the fridge too long!
Solution: How to Choose Fresh Salmon Roe
To avoid that unpleasant fishy taste, the most important step is choosing fresh salmon roe. Here’s what to look for:
- Color: Fresh salmon roe should be a vibrant orange color, not dull or brownish. The color is a good indicator of freshness.
- Smell: Fresh roe should have a clean, ocean-like smell. If it smells fishy or sour, it’s likely not fresh and should be avoided.
- Storage: Make sure you’re buying your salmon roe from a reliable source and storing it correctly in the fridge to preserve its freshness. Fresh roe should be eaten within a few days of purchase.
By ensuring the freshness of your salmon roe, you can enjoy its delicate, briny flavor without the unpleasant fishiness. 😋
Problem: Salmon Roe Falling Off Sushi
It’s the moment of truth—the sushi is ready, and just as you’re about to take a bite, the salmon roe starts falling off! This can be frustrating, but it happens more often than you think, especially if you’re new to sushi making.
Solution: Proper Sushi Making Techniques
Here are a few tips to keep the salmon roe in place:
- Don’t Overload: Be careful not to add too much salmon roe on top of your sushi. A little goes a long way, and adding too much can cause it to slide off. Stick to a small spoonful of roe for each sushi roll.
- Use Fresh Rice: The sushi rice needs to be just sticky enough to hold everything in place. If the rice is too dry or too wet, the roe will slide right off. Make sure your rice is at the perfect consistency for rolling.
- Press Lightly: When you’re rolling the sushi, gently press the nori and rice together. This helps everything stay compact and prevents the roe from falling off when slicing.
By mastering these sushi-making techniques, you’ll be able to enjoy perfectly intact salmon roe sushi every time! 🏆
Problem: Storing Salmon Roe
Sometimes, you might have leftover salmon roe after making sushi. The last thing you want is for it to go bad, especially since fresh roe is a delicacy.
Solution: Best Practices for Freshness and Longevity
To make sure your leftover salmon roe stays fresh, follow these steps:
- Refrigerate Immediately: Store your salmon roe in an airtight container in the fridge right after using it. The colder it stays, the longer it will last.
- Avoid Freezing: While freezing might seem like a good idea, it can ruin the delicate texture of the roe. It’s best to consume fresh roe within a few days to ensure optimal flavor and texture.
- Check Before Using: Always check your roe before using it again. If it has changed color, texture, or smells off, it’s best to discard it and buy fresh roe.
Proper storage is essential to keeping your salmon roe as fresh as possible for future sushi nights. Keep it cool, and you’ll be good to go! 🧊
Additional Tips for Making Perfect Salmon Roe Sushi
Now that you’re equipped to tackle common sushi-making challenges, let’s dive into a few extra tips to take your salmon roe sushi to the next level. These easy tricks will enhance the flavor, presentation, and overall experience, making your sushi even more memorable and impressive!
Tip 1: Add a Touch of Wasabi
Wasabi is a timeless companion to sushi, offering a spicy kick that pairs wonderfully with salmon roe. For a touch of heat, spread a thin layer of wasabi directly on the rice before adding the roe. The subtle heat enhances the rich, briny flavor of the salmon roe, creating a perfect balance. Remember, a little goes a long way—too much wasabi can overpower the delicate taste of the roe, so use it sparingly for the best experience!
Tip 2: Use a Sushi Rolling Mat for Perfect Rolls
If you haven’t yet, consider getting a sushi rolling mat—it’s a total game-changer! This handy tool ensures your rolls are even and tight, preventing the salmon roe from spilling out. Plus, it helps you achieve that polished, professional look, taking your homemade sushi to the next level. With a rolling mat, your salmon roe sushi will not only taste amazing but also look like it came straight from a sushi bar!
Tip 3: Experiment with Garnishes
Add an elegant touch to your salmon roe sushi with garnishes like thin slices of creamy avocado, fresh cucumber, or a delicate sprinkle of sesame seeds. These simple yet flavorful additions not only enhance the taste but also elevate the visual appeal of your sushi. It’s often the little details that transform a delicious dish into an unforgettable masterpiece!
Why You Should Make Salmon Roe Sushi at Home
There are so many great reasons to try making salmon roe sushi at home! It’s not just a fun and engaging cooking project; it’s also a fantastic way to showcase your skills and impress friends and family. By preparing sushi yourself, you have full control over the quality and freshness of the ingredients, ensuring a delicious result tailored exactly to your tastes. Plus, it’s the perfect opportunity to get creative in the kitchen!
Salmon roe sushi is more than just tasty—it’s a healthy choice, too. Loaded with omega-3 fatty acids, protein, and essential vitamins, it’s a nutrient-packed snack or meal that delights your palate while nourishing your body. Whether you’re a sushi connoisseur or simply eager to try something new, making salmon roe sushi at home is an experience you won’t want to miss!
Conclusion: Enjoy Your Delicious Homemade Salmon Roe Sushi!
Making salmon roe sushi at home is not as daunting as it seems, and the rewards are truly satisfying. With just a handful of ingredients and easy-to-learn techniques, you can bring this Japanese delicacy to life in your own kitchen. Whether it’s for a celebration or a fun weekend activity, homemade salmon roe sushi never fails to impress. So, gather your ingredients, roll up your sleeves, and treat yourself to a dish that’s both delightful to eat and exciting to create.
Now that you’ve mastered the basics, let your creativity shine! Experiment with different toppings, try new combinations, and enjoy the artistry of sushi-making. Remember, sushi is as much about the journey as it is about the taste. Happy rolling and enjoy your sushi adventures!
Curious about the health benefits of salmon roe? Check out Is Salmon Roe Healthy to learn more!
Wondering how salmon roe compares to caviar? Don’t miss our article on Salmon Roe vs Caviar to find out which one reigns supreme!
If you want to know more about Ikura salmon roe, head over to Ikura Salmon Roe for all the details.
For everything you need to know about salmon roe, check out our comprehensive guide on Salmon Roe.