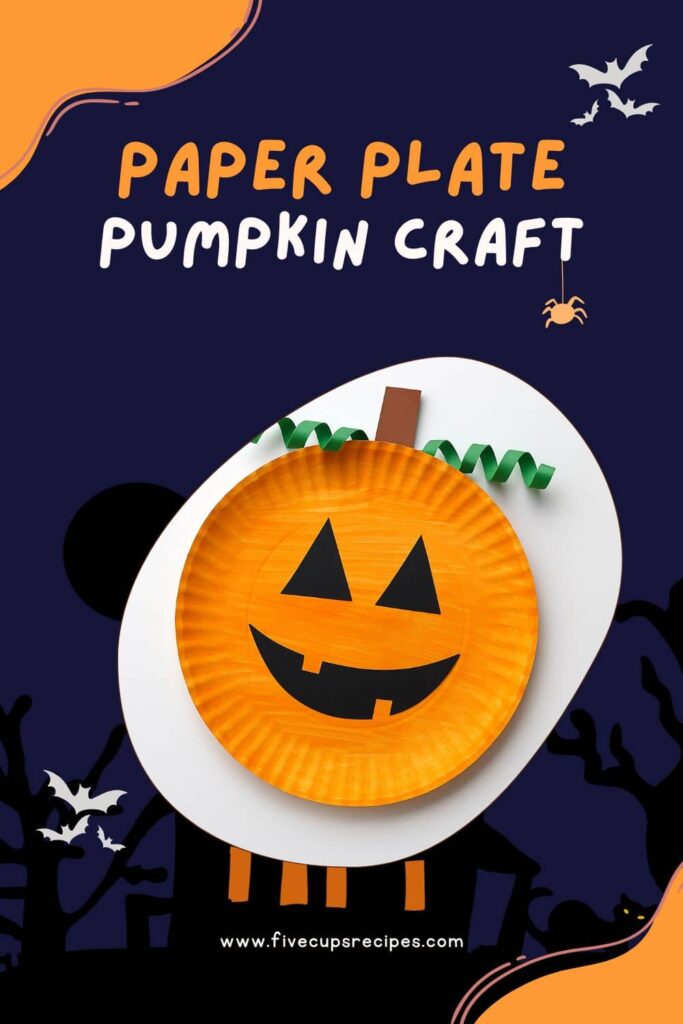
Are you looking for a fun and easy Halloween craft? Our easy paper plate pumpkin craft is a perfect choice! My kids had so much fun with this project on a rainy afternoon—they couldn’t stop talking about their adorable pumpkins! This simple and engaging activity is not only a great way to bring out the creativity in your little ones but also a wonderful opportunity to create some festive decorations for Halloween.
Why Make This Activity
Making paper plate pumpkins offers numerous benefits for children. Not only does it spark creativity, but it also promotes sensory play and helps develop fine motor skills as children cut, glue, and decorate. This craft is perfect for a variety of occasions like birthday parties, school projects, or just some fun at home. Whether you’re looking to keep the kids entertained during a weekend or searching for an exciting Halloween activity to share with siblings or classmates, this craft fits the bill perfectly!
How to Make the Easy Paper Plate Pumpkin Craft
This craft is straightforward and requires minimal supervision—just enough to ensure safety while children wield scissors and glue. The goal is to transform a plain paper plate into a vibrant jack-o’-lantern that can be displayed with pride! Below, I’ll outline all the materials you’ll need and provide clear, step-by-step instructions to help you along the way.
Materials Needed:
- 2 paper plates
- Orange paint or orange construction paper
- Green and brown construction paper
- Googly eyes (optional)
- Glue
- Scissors
- Paintbrush (if using paint)
- Black marker or black construction paper for facial features
- Plastic tray for easier cleanup (optional)
Steps:
- Prepare the Plates: Take both paper plates and paint them entirely orange or cut out a large orange circle from construction paper and glue it onto one plate. If using paint, let the kids use a paintbrush for an even coat.
- Drying Time: Set the painted plates aside and allow them to dry completely. This usually takes about 30 minutes, depending on the thickness of the paint.
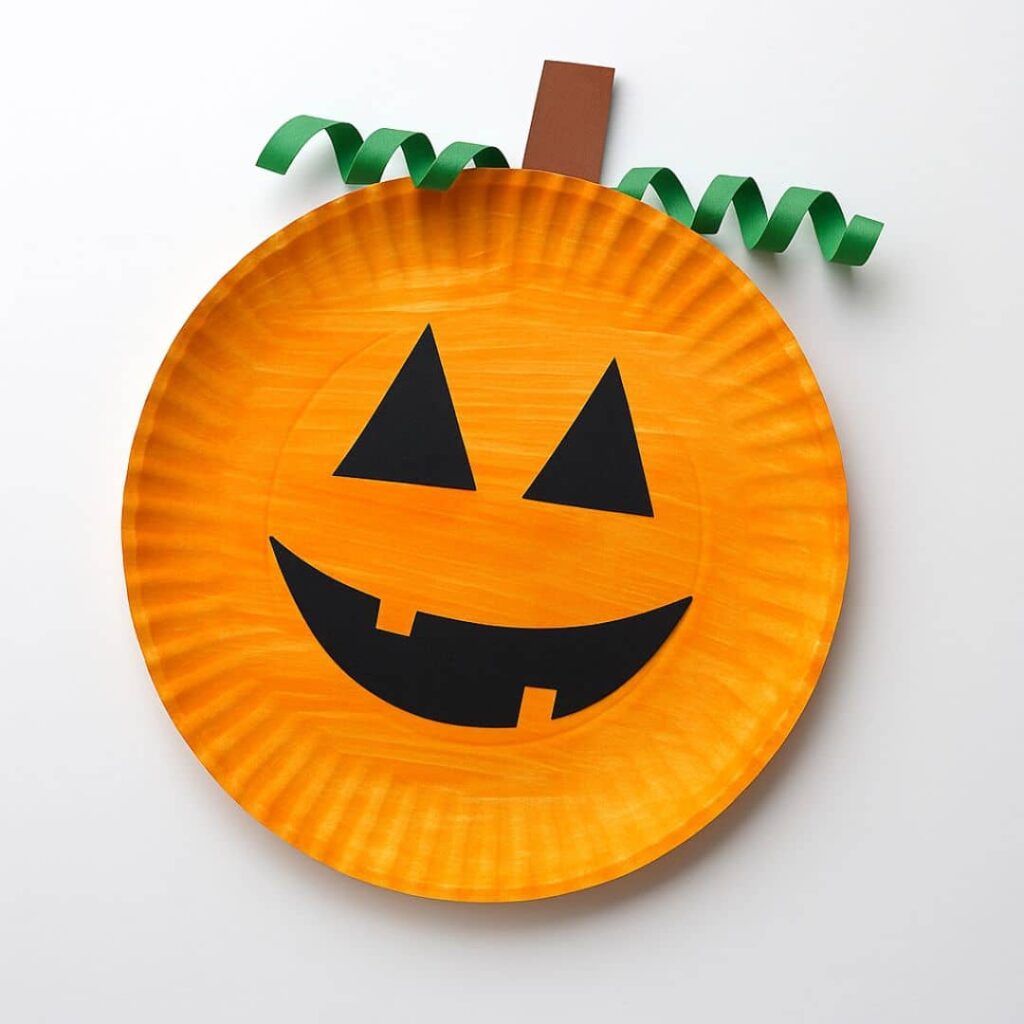
- Create the Pumpkin Stem: While waiting for the plates to dry, help your child cut out a small rectangle from the brown construction paper, approximately 2 inches by 1 inch, to serve as the stem.
- Cut Leaves: Next, cut out leaf shapes from the green construction paper. Kids can get creative with sizes and styles!
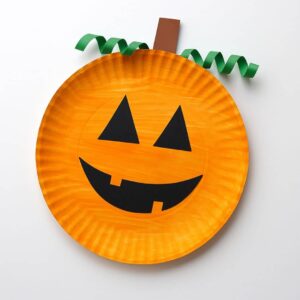
- Assemble the Pumpkin: Once the plates are dry, flip one plate over (the one without the orange color). Glue the brown rectangle to the top of this plate to represent the pumpkin’s stem.
- Add Features: Use the black marker to draw eyes, a nose, and a mouth on the front of the orange plate. For an extra fun element, glue on googly eyes!
- Finish Up: Glue the decorated orange plate on top of the other plate and attach the green leaves to the stem area.
- Display: Your pumpkin craft is now complete! Hang it up or place it on a table as part of your Halloween décor.
How to Use or Play With the Easy Paper Plate Pumpkin Craft
Once the pumpkins are crafted, kids can incorporate them into imaginative play! They can create pumpkin characters for a Halloween-themed storytime session, use them for classroom decoration, or even have a mini pumpkin contest with siblings or friends. Encourage them to express their creativity by coming up with different backstories for their jack-o’-lanterns or developing games around their creations. Observing how children engage with their crafts can provide insights into their imaginative worlds.
How to Store or Reuse the Easy Paper Plate Pumpkin Craft
This craft can beautifully last the Halloween season if stored correctly. To keep your paper plate pumpkins looking good, place them in a flat storage container to avoid bending or crushing. They can be reused annually, simply by freshening up the paint or decorations if they begin to fade. If kept in a dry, cool place, they should last until the next Halloween.
Tips to Make the Easy Paper Plate Pumpkin Craft Successful
- Help with Scissors: For younger children, assist with cutting the paper and using scissors safely.
- Avoid Mess: Set up in an area that’s easy to clean, and consider using a plastic tray to catch paint drips or glue spills.
- Encourage Creativity: Let kids choose how to decorate their pumpkins for more personalized creations.
- Mix Materials: Use various textures—like fabric scraps or glitter—for a more appealing design.
- Take Breaks: If kids lose interest, take a short break and return to the project later with renewed enthusiasm.
What to Avoid When Making or Using the Easy Paper Plate Pumpkin Craft
- Using Heavy Materials: Avoid using heavy materials that may make the pumpkins difficult to display.
- Skipping Drying Time: Don’t rush the drying process if painting, as this may cause smudging or uneven colors.
- Overcomplicating Steps: Keep the instructions simple to ensure younger kids can follow along without frustration.
- Inadequate Supervision: Ensure proper supervision when scissors and glue are involved.
Possible Variations
- Theme Change: Try making paper plate ghosts or turkeys for a seasonal variety.
- Material Swap: Use fabric or felt for a softer texture instead of paper.
- Group Size Adjustment: Adapt this craft for larger groups by preparing a “crafting station” with multiple supplies.
FAQs
Q: What age range is this craft suitable for?
A: This craft is perfect for children aged 4 and up, as younger children may require more adult assistance, particularly with cutting and gluing. This ensures their safety and allows them to enjoy the creative process without frustration.
Q: What safety precautions should I consider?
A: Always supervise young children with scissors and glue. Opt for child-safe scissors, and ensure that glue is non-toxic and washable. Set up the crafting area away from valuable items to avoid accidental spills or messes.
Q: How can I adapt the activity if I’m missing materials?
A: If you don’t have orange paint, you can always use orange construction paper as an alternative. If you’re short on googly eyes, you can draw the eyes with a black marker instead. Be creative and use what you have on hand!
Conclusion
I hope you and your kids enjoy making these easy paper plate pumpkins this Halloween! It’s a delightful way to spend time together, cultivate creativity, and start a festive season filled with laughter. Don’t forget to share your creations with friends and family or bring out this craft year after year for even more fun! Happy crafting!
Easy Paper Plate Pumpkin Craft
Ingredients
Materials Needed
- 2 pieces paper plates Base for the pumpkin
- 1 bottle orange paint Can also use orange construction paper
- 1 sheet green construction paper For leaves
- 1 sheet brown construction paper For the stem
- optional Googly eyes To add fun features
- 1 tube Glue To attach paper and features
- 1 pieces Scissors For cutting shapes
- 1 pieces Paintbrush If using paint
- 1 pieces Black marker For facial features
- optional Plastic tray For cleanup
Instructions
Preparation
- Take both paper plates and paint them entirely orange or cut out a large orange circle from construction paper and glue it onto one plate.
- If using paint, let the kids use a paintbrush for an even coat.
Drying
- Set the painted plates aside and allow them to dry completely, about 30 minutes.
Create the Pumpkin Stem
- Help your child cut out a small rectangle from the brown construction paper, approximately 2 inches by 1 inch.
Cut Leaves
- Cut out leaf shapes from the green construction paper.
Assemble the Pumpkin
- Once the plates are dry, flip one plate over (the one without the orange color). Glue the brown rectangle to the top to represent the pumpkin’s stem.
Add Features
- Use the black marker to draw eyes, a nose, and a mouth on the front of the orange plate. Optionally glue on googly eyes.
Finish Up
- Glue the decorated orange plate on top of the other plate and attach the green leaves to the stem area.
Display
- Your pumpkin craft is now complete! Hang it up or place it on a table as part of your Halloween décor.
Notes