DIY Glitter Shaving Cream Slime is the ultimate sensory activity for kids who love hands-on fun and sparkly textures. This slime combines the light, airy feel of shaving cream with the eye-catching shimmer of glitter, making it a favorite for crafting afternoons, rainy days, and even science-themed play. It’s simple to make, highly customizable with colors and add-ins, and delivers hours of entertainment without expensive materials.
Beyond just being fun, this slime also introduces kids to basic science through safe chemical reactions and encourages creativity through texture, color, and design choices. Whether you’re guiding a classroom experiment or just looking for a new weekend activity, this glitter slime recipe is a reliable go-to. It’s a perfect balance of learning, play, and sparkly magic you can make right at home
What Is Glitter Shaving Cream Slime?
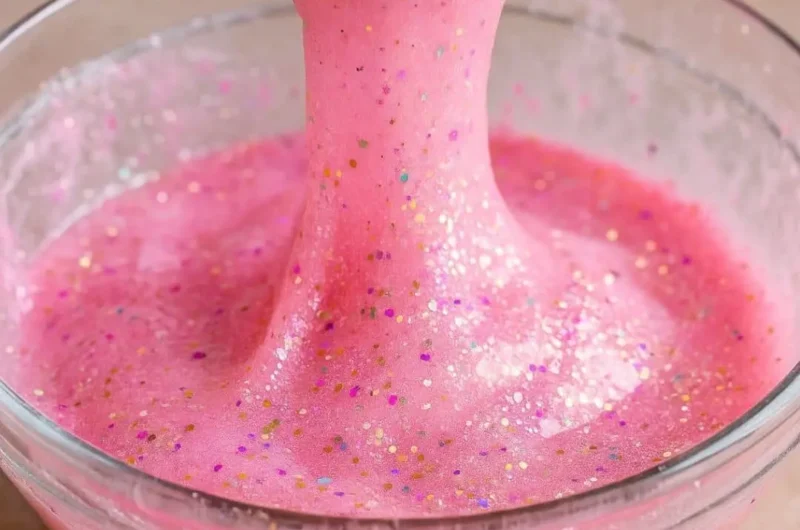
Glitter shaving cream slime is a soft, stretchy, and fluffy version of traditional slime. By combining shaving cream with glue and contact lens solution, you get a whipped texture that is both light and moldable. The clear glue base allows glitter to shine through, while the added shaving cream gives the slime a cloud-like volume that kids love to squish and stretch.
This slime is not only fun to make, it also introduces basic chemistry, fine motor skills, and creativity into one enjoyable activity.
Why Kids (and Adults) Love This Slime
Unlike many crafts that result in a single-use item, slime is an open-ended activity. Children can play with it repeatedly, change its texture, stretch it, pull it, fold it, or poke it. Parents appreciate how easy it is to whip up with household ingredients, and educators love how it integrates tactile learning into science lessons. It’s especially great for:
- Rainy day activities
- Birthday parties
- Classroom experiments
- Calming sensory play
Benefits of Making DIY Glitter Shaving Cream Slime at Home
Educational Value
Crafting slime helps kids understand basic science concepts, such as chemical reactions and polymers. Measuring ingredients also introduces simple math skills and encourages independence.
Sensory Stimulation
The texture, color, and sparkle of the slime provide multisensory feedback that can be soothing and beneficial, especially for kids who enjoy tactile play. This makes it an excellent activity for children with sensory processing needs.
Budget-Friendly Fun
Slime ingredients are inexpensive and readily available. You can make multiple batches in different colors and textures without spending much. It’s a cost-effective way to entertain a group of kids.
Encourages Creativity
From choosing glitter colors to experimenting with scents and textures, slime-making is an outlet for creative expression. Kids are free to invent their own versions and proudly show off their creations.
Ingredients and Supplies : DIY Glitter Shaving Cream Slime
Ingredients
- 1 cup clear PVA glue (for maximum sparkle)
- 1 to 2 cups shaving cream (foam, not gel)
- 1/2 teaspoon baking soda
- 1 tablespoon contact lens solution (must contain boric acid)
- Food coloring (optional)
- Glitter (fine, chunky, or holographic)
- Optional: scented oil, confetti, or foam beads
Supplies
- Large mixing bowl
- Measuring spoons and cups
- Mixing spoon or spatula
- Airtight container for storage
- Gloves (optional)
Step-by-Step Instructions
Step 1: Pour the Glue
Start by pouring 1 cup of clear glue into a large mixing bowl. This will form the base of your slime. Clear glue is essential for showcasing glitter effectively.
Step 2: Add Shaving Cream
Add 1 to 2 cups of shaving cream to the bowl. The more you use, the fluffier the slime. Stir gently until fully combined with the glue. Be careful not to overmix, which can deflate the foam.
Step 3: Add Baking Soda
Sprinkle in 1/2 teaspoon of baking soda. Mix well to distribute it evenly. Baking soda helps adjust the pH and prepare the slime for activation.
Step 4: Add Food Coloring (Optional)
If you want to add color, now is the time. A few drops go a long way. Mix until you achieve an even tone. For a pastel shade, use only one drop. For bold tones, use more or combine colors.
Step 5: Add Glitter
This is the fun part. Pour in a generous amount of glitter. Mix slowly to prevent it from spilling. Combine multiple glitter types for a multidimensional sparkle. The more glitter, the more magical the effect.
Step 6: Activate with Contact Solution
Add 1 tablespoon of contact lens solution. Mix slowly. You’ll notice the slime beginning to pull away from the bowl. If it’s still sticky, add a few more drops, mixing thoroughly. Be cautious not to over-activate the slime, as it can become rubbery.
Step 7: Knead the Slime
Once the slime begins to clump, use your hands to knead it. Continue kneading for 3 to 5 minutes until it becomes stretchy, fluffy, and easy to handle. If it’s too sticky, add another drop of contact solution. If it’s too stiff, a splash of warm water can help restore softness.

Storage Tips
To keep your slime fresh, store it in an airtight container or resealable plastic bag. Avoid direct sunlight and high heat. Slime typically lasts 5 to 7 days. If it begins to dry out, add a few drops of water and knead again.
Safety Guidelines
- Always supervise children under 6 during slime play
- Wash hands before and after playing
- Do not eat the slime
- Avoid letting slime touch carpets, fabric, or upholstered furniture
Fun Variations to Try
- Cotton Candy Slime: Use pastel pink and blue food coloring, swirl them together for a dreamy look
- Galaxy Slime: Mix black, navy, and purple coloring with star-shaped glitter
- Confetti Slime: Add fun sequins and party sprinkles for a celebration effect
- Glow-in-the-Dark Slime: Use glow-in-the-dark glue or add glow powder
Frequently Asked Questions : Glitter Shaving Cream Slime
Can I use white glue instead of clear glue?
Yes, but the slime will appear more opaque and the glitter won’t shine as clearly.
What can I do if the slime is too sticky?
Add more contact lens solution a few drops at a time and knead until the slime firms up.
How do I make the slime stretchier?
Add a small amount of warm water and knead thoroughly to improve elasticity.
Is contact lens solution the same as borax?
No. Borax is a powder, while contact lens solution contains boric acid and is a safer alternative for children.
Can I add fragrance?
Yes. Add a few drops of essential oil such as lavender, peppermint, or vanilla for a pleasant scent.

Final Thoughts
Glitter shaving cream slime is more than a trending craft project. It’s a rich sensory experience that encourages exploration, creativity, and scientific thinking. Whether you’re looking for a weekend activity or a classroom project, this slime recipe is guaranteed to bring sparkle and fun to the day. It’s easy to customize, safe when used properly, and a great opportunity to connect with your kids through tactile play.

Glitter Shaving Cream Slime
Ingredients
Main Ingredients
- 1 cup clear PVA glue for maximum sparkle
- 1 to 2 cups shaving cream must be foam, not gel
- 1/2 teaspoon baking soda
- 1 tablespoon contact lens solution must contain boric acid
- to taste food coloring optional
- to taste glitter fine, chunky, or holographic
- to taste scented oil, confetti, or foam beads optional add-ins
Instructions
Preparation Steps
- Start by pouring 1 cup of clear glue into a large mixing bowl. This will form the base of your slime.
- Add 1 to 2 cups of shaving cream to the bowl and stir gently until fully combined. Be careful not to overmix.
- Sprinkle in 1/2 teaspoon of baking soda and mix well.
- If desired, add a few drops of food coloring and mix until you reach an even tone.
- Pour in a generous amount of glitter and mix slowly to incorporate.
- Add 1 tablespoon of contact lens solution and mix thoroughly until the slime begins to pull away from the bowl.
- Knead the slime for 3 to 5 minutes. Adjust consistency with additional contact solution or a splash of warm water if needed.


